Has your bathroom started to look a little *ahem*… dishevelled, of late? Perhaps you’re starting to worry that guests will secretly judge your boring old cabinets or leaky shower head? Don’t fret! While it’s unlikely your friends will abandon you for a less-than-perfect bathroom, you don’t have to put up with the flaws and blemishes that play on your mind at night. Even better – you can transform the look and feel of your bathroom at low cost AND with your very own hands. The are many low-risk and simple DIY hacks to keep your bathroom looking loved.
But… renovating a bathroom is tricky, right?
We get it – overhauling your bathroom can feel daunting. On the one hand, our poor old bathrooms go through a lot on an average day, contending with everything from high humidity (who can resist a toasty shower?) to the soap suds we gleefully splash everywhere during a relaxing bath.
This means they can look tired quickly, developing mould and grime in the most inconvenient places. Fortunately, with a few touch-ups here and there, you can combat the everyday wear and tear that affects every bathroom throughout its life.
We’re not (we repeat, NOT) suggesting that you test out your plumbing skills. If you’re hoping to install a new shower or adjust the layout of your bathroom, it’s time to call in the professionals. We're talking about the small projects even novice DIYers can pull off with a little hard work and determination. Minor changes could leave your bathroom feeling fresh and modern and could even bump up the value of your property.
To help you get started, then, we’ve put together a list of our fave tips and tricks for sprucing up your bathroom on a budget:
- Redo your sealant
No matter how hard you scrub, black mould loves to cling to bathroom sealant – not a great look. We’ve got good news for you, though – sealant is mercifully easy to remove and replace, even if you’re a DIY virgin. This scandalously satisfying task shouldn’t take more than half a day, and it’ll leave your bathroom looking as good as new. So, where to begin?
First, you’ll need to secure the right materials, including:
- Sealant
- A sealant gun
- Sealant remover
- A sealant stripping tool
- A scraper
- Clean spirit
- Sealant profiling tools
Next, you’ll need to scrape and remove your old sealant using the tools above and apply a new coat of sealant. Once you’ve achieved the perfect finish using your profiling implements, you should allow the sealant to dry and marvel at your hard work! If you’re a little hazy about the details, Roomix’s sealant kit even includes a step-by-step guide to prevent any mishaps – it couldn’t be easier!
- Replace your showerhead, taps, and faucets
Replacing a sink or bath is a time-consuming and costly job best left to the professionals. But we’ll let you in on a little secret… replacing your fixtures could make a world of difference to the look and feel of your bathroom. If your bath looks drab and outdated, adding hip new taps and handles will instantly inject the room with a little luxury. Even better, most fixtures and taps are designed to be screwed on and off in a few simple steps. Here’s how you’d replace a tap, for example:
- Temporarily turn off your main water supply (you don’t want water spurting everywhere, after all).
- Look under the sink and unscrew the nut that fixes the basin to the tap, detaching the tap from the pipework.
- Feed the pipework through the new tap, and screw it onto the basin.
- Connect the plumbing to the tap using flexible connectors.
- Switch the water supply back on and… voila! A new working tap!
The processes involved will differ depending on the type of fixture you want to replace, so remember to follow any instructions that come with your appliances and reach out to Roomix if you need a helping hand!

New taps, shower heads and faucets make a world of difference to the look and feel of your bathroom
 Most fixtures and taps are designed to be screwed on and off in a few simple steps
- Wall panelling
Replacing wall tiles is intricate work, requiring grouting skills you probably don’t possess. So, how can you show your weathered walls some love? Two words: wall panelling. Adding wooden wall panelling strips to your bathroom is easy, cost-effective, and oh-so-sophisticated.
Of course, you’ll need to purchase moisture-resistant strips to ensure your panelling can withstand a bathroom environment. This is where Roomix comes in. All our panelling kits come with moisture-resistant strips that you should combine with bathroom-appropriate paint for maximum defence against splashes and humidity. Our Shaker Wall Panelling, for example, features comprehensive instructions and all the tools you need to achieve the perfect finish, including:
- Moisture-resistant MDF wood panels
- Wood glue
- Sandpaper and sandpaper block
- Wood filler
- Caulk
- Protective sheets
- Pencil and masking tape

Adding wooden wall panelling strips to your bathroom is easy, cost-effective, and makes an impact
- Tile Stickers
Stick-on tiles are great, as they can add a splash of colour and fun to your bathroom at a low cost and low risk. Simply attach them to the desired areas of your bathroom, and experiment with colours and patterns if you’re feeling a bit artsy.

Add a splash of colour and whimsy to your bathroom with stick on tiles

Stick on tiles are a quick and cheap way to transform your bathroom
- Paint your cabinets
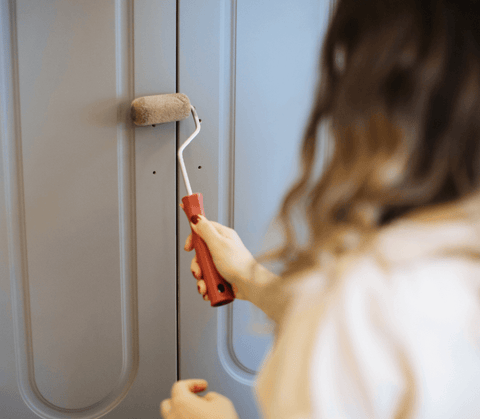
Re-doing versus replacing helps to reduce the waste created every year by the construction industry in the UK. By adding a lick of paint to your existing cabinets, you can avoid adding anything to landfill while giving your bathroom a whole new look. Don’t be afraid to experiment – from deep cherry reds to seductive navy blue, anything goes in today’s modern bathrooms.

Painting your cabinets avoids adding anything to landfill while giving your bathroom a whole new look
 Don’t be afraid to experiment – from deep cherry reds to seductive navy blue, anything goes in today’s modern bathrooms
Get started with Roomix today!
So, there you have it – some quick and easy ways to breathe new life into your bathroom. If you’re itching to get started, head over to the Roomix website today. On top of our wall panelling kits, we’ve got a team of experts on-hand to help you achieve your DIY dreams. Got questions? Don’t hesitate to reach out!


